 |
| Scones |
 |
| Assembled scone |
However, in April this year I had great success with the banana scones from the Raspberri Cupcakes blog and was very keen to try out her recipe for plain scones - I love that both recipes require you to stir cream into flour, rather than rubbing butter into flour. Easy! I also recently saw The Most Perfect looking scones ever on Fanny's impossibly pretty blog: Like A Strawberry Milk, which uses the traditional rub-butter-into-flour technique, but also has a really helpful list of techniques and tips to make perfect scones. She says you can use any scone recipe you like, but that incorporating her techniques will result in better results.
So, I thought, why not try it? The measurements and ingredients from Raspberri Cupcakes, and all the techniques from Like a Strawberry Milk! The combined recipe, adapted from both sources, is included below for your (and my) reference, for the next time I feel like whipping up some fabulous scones!
Prior to the weekend, I packed all my scone-making gear: (plus some extra utensils for other things, hence the tongs!)
And in an uncharacteristic show of being organised, I'd pre-measured out the dry ingredients, so that all I'd need to do on the morning was stir in the liquid ingredients.
 |
| Pre-measured dry ingredients |
Here's the dough, gently patted together.
 |
| Scone dough, ready for cutting |
 |
| Starting to cut... |
...but the underside is pretty and smooth. Such a small tip, but it makes a big difference!
 |
| Smooth upside down scones |
The other tip I loved was to double glaze the scones with egg yolk. I've used this technique before on pastry, having learned it at Carême Pastry in the Barossa, and it worked really well on these scones.
 |
| Super-golden egg yolk glaze |
There were a few slightly slopey ones, cut from the second round of dough, but most of them were nice and even. Woo-hoo!
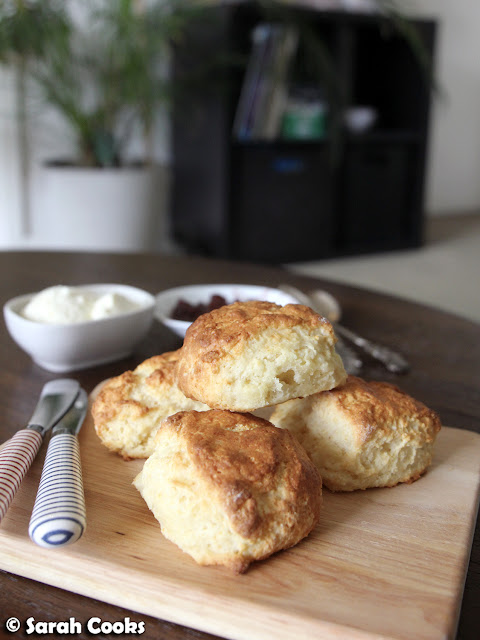
They rose satisfactorily, they had smooth tops, they were nice and shiny, they were round, and they were light and fluffy, with a lovely crust. They were everything I want in a scone! Super happy scone satisfaction - YAY!
Scones
Recipe adapted from Raspberri Cupcakes and Like a Strawberry Milk
Ingredients2 cups self-raising flour1/4 tsp salt150ml single creamApprox 2/3 cups full fat milk1 egg yolk, beaten
MethodSift the flour and salt into a large bowl. Make a well in the centre, and pour in the cream, stirring gently to combine with a large palate knife, or other flat bladed knife. Gradually pour in the milk, gently stirring all the while, until there is enough liquid to form a soft dough. (You may not need all the milk).Place dough onto a lightly floured large wooden board, and, working gently, gather the dough together with lightly floured hands until it is just smooth. (Don't knead or vigorously work the dough, or the scones will become tough). Pat the dough into a rectangle about 3 cm thick. Loosely cover with clingwrap and refrigerate for 30 minutes.Preheat the oven to 220C.Take the dough out of the fridge, and remove the clingwrap. Cut into rounds using a well-floured 5cm fluted cutter. Make sure to cut straight up and down, not twisting the cutter. As you cut each scone, flip it over to reveal the smooth underside, and place close together on a tray lined with baking paper. Pull the scraps of dough together and continue to cut until all the dough is used up.Brush the tops with beaten egg yolk (if you have enough time and egg, let the scones sit out for 10 minutes and then glaze again for extra shine!)
Place into the oven and bake for 10-15 minutes, until lightly browned and cook through. Allow to cool slightly then eat with lashings of jam and cream.
Makes 10-12 scones






7 comments
They look marvelous! I recently made a batch of scones (look for the post soon :) ) but yours seem to have turned out so much better.
ReplyDeleteNow I want some more scones. Maybe another batch after work is in order ;)
Congrats on your scone success :) they look great!
ReplyDeleteThanks for the tips. :D Now I know how perfect scones are made. :)
ReplyDeleteThat tip about flipping the scones over is genius. :)
ReplyDeleteI'm always on the lookout for scone recipes so I may well give yours a try. They look great and fluffy. Another good recipe for a rich scone is Rachel Allen's from Bake.
ReplyDeleteGreat idea to pack it all premeasured for easy pleasures :D
ReplyDeleteI only do lemonade scones, cos the one time I tried something else it didn't work that great!
I so want to make this! you have me craving scones at 6.30pm!
ReplyDelete